Wiring an ethernet cable is a relatively simple task, especially if you have the proper tools and you are not setting up a complex network. Here are the steps to follow. Click on each step for detailed instructions:
Step 1: Get the right tools
Step 2: Measure your wire
Step 3: Cut and strip your wire
Step 4: Separate and straighten out the individual wires
Step 5: Put the wires into the correct order
Step 6: Insert the wires into the Ethernet socket head
Step 7: Double check the order of the wires
Step 8: Crimp the wires
Step 9: Test your cable
Why would you want to wire an ethernet cable
If you are setting up a home office or a new business and you need help with the cabling or wireless network set-ups, contact us.
Wiring an Ethernet Cable
Here are the steps that you need to take when you are wiring an ethernet cable.
Step 1: Get the right tools

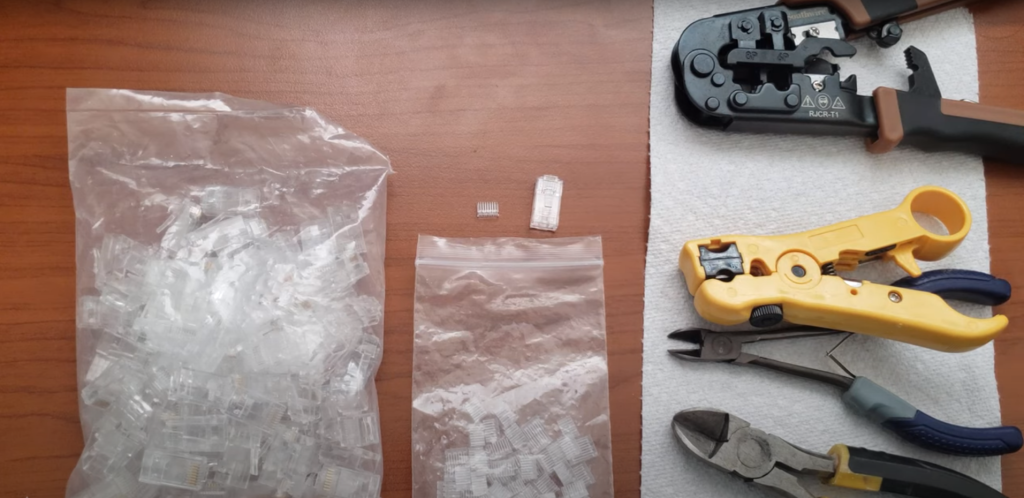
Start wiring an Ethernet cably by gathering all the tools and supplies you will need – Image Source: Screenshot from ColoradoRMN
As with most tasks, having all the right tools that you will need will make all the difference in successfully wiring an ethernet cable. Here is a list of things that you should have:
- Ethernet cable: You should get Category (Cat) 5, 5e,6, 6a, or higher depending on the speed and size you need.
- Wire Cutters and Strippers: You will use these to cut and strip the ethernet cable.
- Ethernet socket head: This is the plastic end piece that you put the wires into and that connects to your devices.
- Ethernet Socket head crimper: This tool will seal your socket head together.
If you are not sure which type of ethernet cable you will need, check out this article to learn about the different types.
Step 2: Measure your wire
Make sure that you have enough wire for the distance that you want to cover. Measure out how long you will need the wire to be before you start cutting it. It’s always best to cut it a little bit longer than you think you will need, just in case.
Step 3: Cut and strip your wire

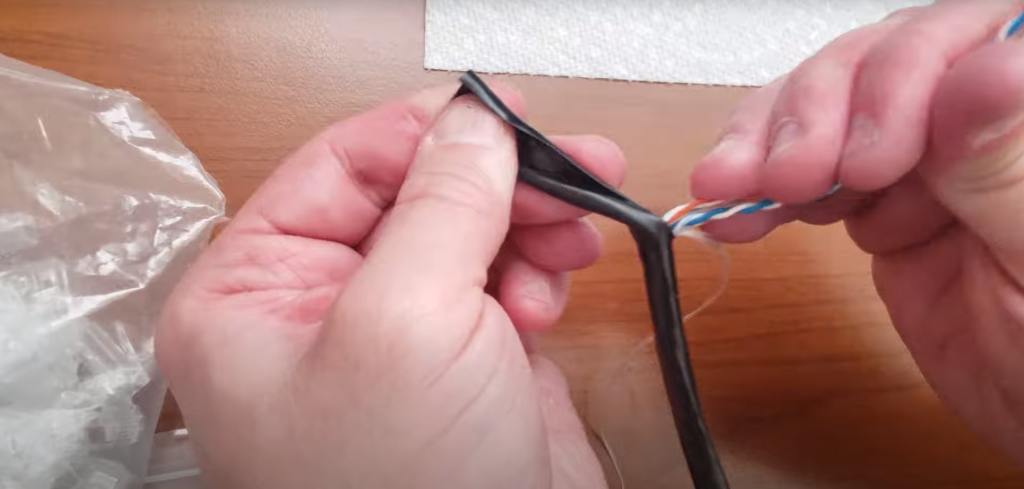
Be careful not to damage the wires when you remove the outer jacket – Image Source: Screenshot from ColoradoRMN
If you have more wire than you need, cut it to the right length with your wire cutters. Carefully strip off the outer covering with your wire stripper. Be careful not to damage any of the smaller wires that are inside the casing. If you damage any of the wires, they may not work properly or they may not work at all.
Step 4: Separate and straighten out the individual wires
Inside the casing you will find four sets of two wires twisted together. That is why they are referred to as twisted pairs. Each of the four pairs have a colour scheme as follows:
- Blue and blue/white
- Brown and brown/white
- Green and green/white
- Orange and orange/white
Untwist each pair of wires and straighten them out. This will make it easier for you to put them into the correct order.
Step 5: Put the wires into the correct order

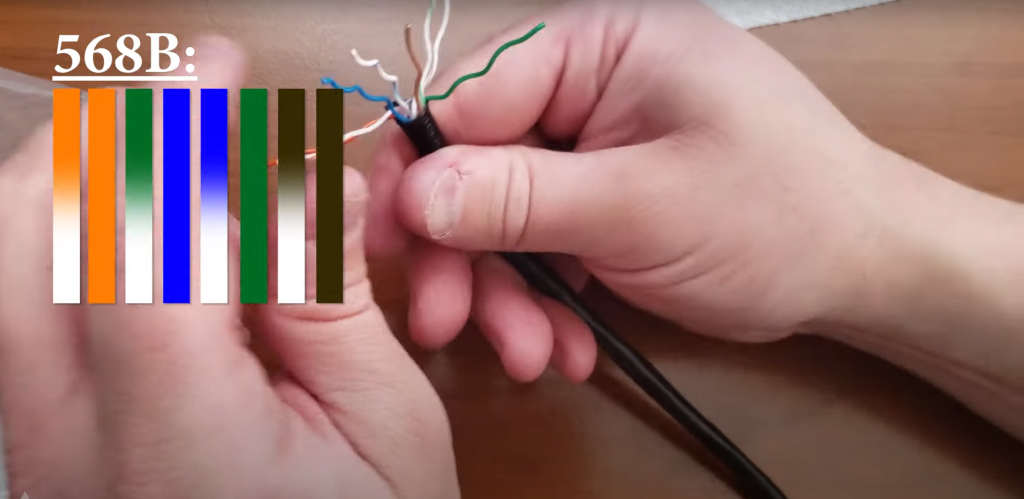
When wiring an ethernet cable make sure the wires are in the correct order – Image Source: Screenshot from ColoradoRMN
Once your wires are straightened out arrange them in the following order from left to right:
- Orange/white
- Orange
- Green/white
- Blue
- Blue/white
- Green
- Brown/white
- Brown
It may be difficult at first to get them to stay in the right position, but be patient and eventually they will stay put.
Step 6: Insert the wires into the Ethernet socket head

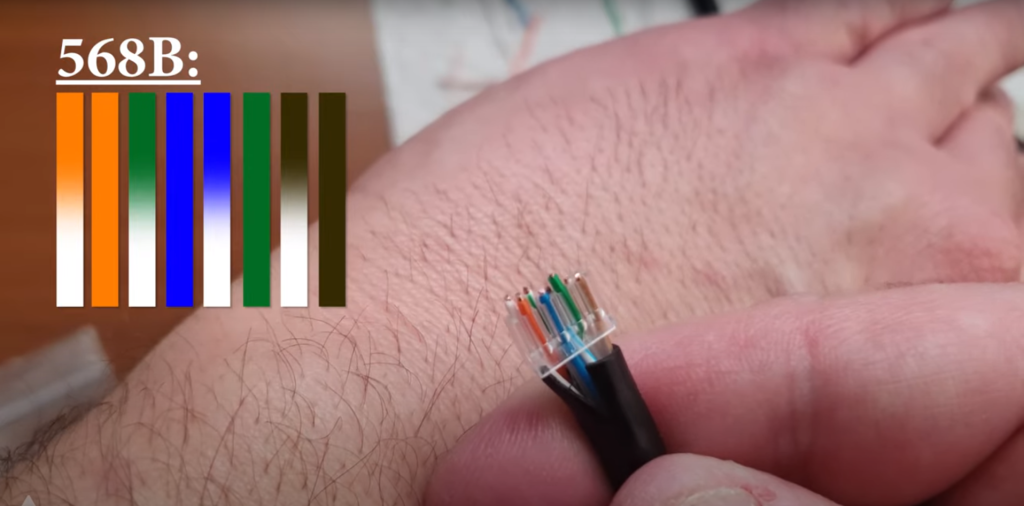
Double check that your wires are in the right order – Image Source: Screenshot from ColoradoRMN
Your wires should be about a half an inch long. You will need to cut them to this length. You want to make sure that the wires are not crushed by the plastic clip.
Make sure that the “clip” on the Ethernet socket head is facing away from you. If you don’t have it facing away from you, then the wires will be backwards. Slowly insert the wires into the Ethernet socket head keeping them in the order given above.
Step 7: Double check the order of the wires
Double check that your wires are in the correct order. Once you have crimped them you can’t change them so you need to make sure that it is right.
Step 8: Crimp the wires
Once you are sure that you have the wires in the right order, push them as far forward as they will go. Make sure that they are seated properly next to the gold pins located at the end of the socket head. You should also make sure that you have lots of sleeving so that you don’t cut into your wires when you are crimping them.
Push the socket head into the crimping device. You will need to push down really hard to correctly crimp the cable. You won’t feel or hear any sound letting you know that it has been crimped properly, that’s why you just need to push down as hard as you can.
Step 9: Test your cable
Plug your cable into the device that you need it for and test to see that it is working.
The following video will show you all the steps in wiring an Ethernet cable.
Why would you want to wire an ethernet cable?
There are a couple of advantages to wiring an ethernet cable yourself. These include:
Lower cost:
It is much cheaper to make your own lengths of ethernet cable than to get them pre-made. For example, you can purchase a 1,000 foot spool of Ethernet cable for about $60 depending on the kind you get and a bag of connectors will cost a few dollars more.
If you were to purchase individual, pre-made, 25-foot Ethernet cables, it would cost you about $8 each. This may seem inexpensive but if you need 1,000 feet of these cables, you would actually spend about $320.
Custom lengths:
Pre-made ethernet cables come in set lengths. By wiring your own cables, you can cut them to the exact length that you need.
Need Help Cabling/Wiring Business or Office?

If you need cabling installed or wireless networks set up, we can help. We have extensive experience in all areas of telecommunications cabling, and networking. We can easily install and set up any type of network that you require. Contact us today to learn more.
Whatever your business telecommunications needs are, Network Telecom is here for you. We have been selling, installing, and servicing every type of phone system for over 40 years. We can even help with training your employees on the features of your new phone system so that you can use it as efficiently as possible.
If your phone system is not working as it should, our trained technicians are available to help 24 hours a day, 7 days a week, 365 days a year. We carry a huge selection of parts in order to quickly solve any component issues you are experiencing.


In addition to our accredited and certified technical expertise, we offer:
- Consultative Sales
- Cloud Services
- Ongoing Support
- Voice Mail Systems
- System Design + Consulting
- System Admin + User Training
- PA Systems
- VoIP Specialist
- Network Cabling
“Network Telecom was wonderful to work with. Helpful and knowledgeable, their team transitioned our office to the new phone system with ease. They were also available to answer concerns and provide additional support post transition. Would definitely recommend their services. Thank you to the team at Network Telecom!”
“We just had an installation done today and it was a great experience. I am not at all tech savvy but everything was explained in a helpful and patient manner. The system seems great and we are really looking forward to running a more efficient office. Highly recommended!”
“Outstanding Service! We had a full phone system installed at a brand new facility and the experience was great. From sales to service the team followed through. The support we have received so far has been excellent. During our install the Network Telecom team even stepped in to help another company who couldn’t complete their portion of the install on time. They truly understand the big picture and will do what it takes to ensure the install is completed to keep your business up and running. 10/10”

